Note:
This article was initially published in March 2008 at www.cgfocus.com as a two part series. We're re-publishing it with the kind permission of Timothy Albee. Thank you!
Back, in the early days of 3D, we tried to do everything "In Camera," which meant that what we got out of the 3D "camera's" renders was what we used as final. This made for a lengthy, iterative process of, tweak-render-repeat, especially in the days of wireframe previews and per-frame render-times easily in the hours or days.
In the mid-nineties, a trend developed to render in "Plates" for the different, Foreground, Midground and Background elements, putting them together in a compositor such as Digital Fusion or After Effects. This let us begin to tweak and adjust the individual elements before laying them all together onto a Background Plate. Rendering in Plates, meant that if you wanted that third space-ship from the right to be just a touch brighter, you adjusted its layer, (isolating the effect further with a soft-edged Polygonal Mask if you wanted to,) and got the results in seconds, as opposed to the minutes or hours it would take to re-render every frame of that entire Plate, (or of the entire shot with its cast-of-hundreds).
Using compositing packages to adjust in near-real-time, (on blazingly-fast 150Mhz machines,) instead of waiting hours for a single frame of a five-day-render, meant that more ideas could be tried-out in an afternoon. And the more ideas we could try quickly, the more daring we became with what we tried... and the better our images looked because of the freedom to explore.
Then, a trend developed for having the compositors work with the rendered images in the same manner as the 3D, working with separate passes for things like Specularity, Diffuse, Fill, Reflection, etc. This let us have even more control over the final image, massaging complex, previously prohibitively lengthy effects like "Blooms," Depth-Of-Field, and Motion Blur into being in a matter of moments when it would have taken days to settle on workable settings in the old, In-Camera way of doing things.
The old days...
When I first started working with "Render Buffers," there were no easy ways to access these magical elements that LW worked together to produce its final render. We had to manually change Light and sometimes even Surface settings, (by swapping full models for those with specialized surfaces,) and direct LW where to save each, individual pass... for every layer... for every scene.
Yet this was still faster, (if more labor-intensive,) than waiting around for an In-Camera render to be absolutely perfect.
"Old-and-Busted"
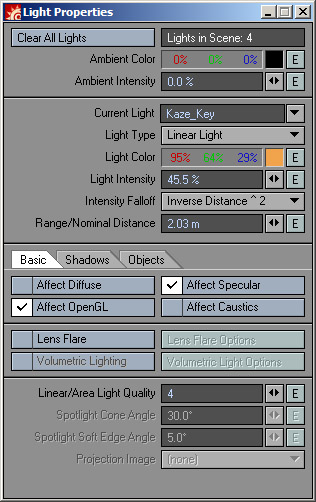
In the old way of doing things, (before tools like D-Storm's Buffer Saver, LW's layered, Photoshop Saver, and the new exrTrader,) if we wanted to, say, generate a render pass that isolated just the specular hits where the lights were glinting brightly off the objects, here's what we'd have to do.
Saving our base Scene as, "sq01sc003_Spec.lws," (so we wouldn't accidentally overwrite this all-important Base with our sometimes destructive modifications,) we'd first change all our lights to affect only the Specular channels of surfaces.
We'd then have to direct the saving path to someplace that made sense, and wouldn't overwrite or be overwritten by other passes, (ie. /sq01sc003_Spec/sq01sc003_Spec_0000.flx ).
The scene would be saved, sent to the Renderfarm, and the process would be repeated for any other passes we may need, (Diffuse, Fill, Luminosity, Shadow, etc.,) for every level, (FG, MG, BG,) into which the Scene needed to be split.
Image Formats, Bit Depth
My old preference for file format was the FLX, "Flexible" format, since it was reliable, was low in "noise," supported an Alpha channel, and used 32, floating-point bits to store information for each channel.
What many of us have been told to think of as a "24-bit, full-color image" is, in professional terms, an 8-bit image, meaning that it has 8-bits to store its Red channel information, 8 for Green, and 8 for blue. This is the minimum the average human eye needs to perceive a continuous tone color image.
And the bits in, say, a standard TGA or JPEG image are also "Integer," which means that they are whole numbers... 0, 1, 2... through 255 in an 8-bit image.
Whereas bits that are "Floating-Point" can count: 0, 1, 2, 2 3/4, 2 7/8, 2 166/167, etc.
Floating-Point images generally regard their channel information as percentages where Black is 0%, and White is 100%, but are not bound by 0 and 100%. A pixel can easily be 1,000% of the intensity of the white your monitor can display, or ten times more black than the Black your monitor can display as well.
And, obviously, an image that has 32-bits per channel, can hold more information in one of its channels alone, than in the R, G and B channels combined, of an 8-bits per channel image.
So, if a "continuous tone" image needs only 8 Integer bits per channel, why would you ever want to render to a 32-bit, Floating-Point format? Well, it's important if your final output is film, which can represent significantly more subtlety in color than your monitor can. And/or, if you plan on having a Floating-Point, high-bit-depth compositing package, like Fusion, factor heavily into your pipeline.
With a Floating-Point, 32-bit/channel, image, you can "push" your images colors, contrast, brightness, all over the place, and still preserve the smoothness to even your most subtle, smoothest gradients. This lets you just get "in the ballpark" with the render out of your 3D package... get the grass "roughly green," and the skies "roughly blue," using the (now) real-time feedback of the compositing packages to bring the images to their final glory.
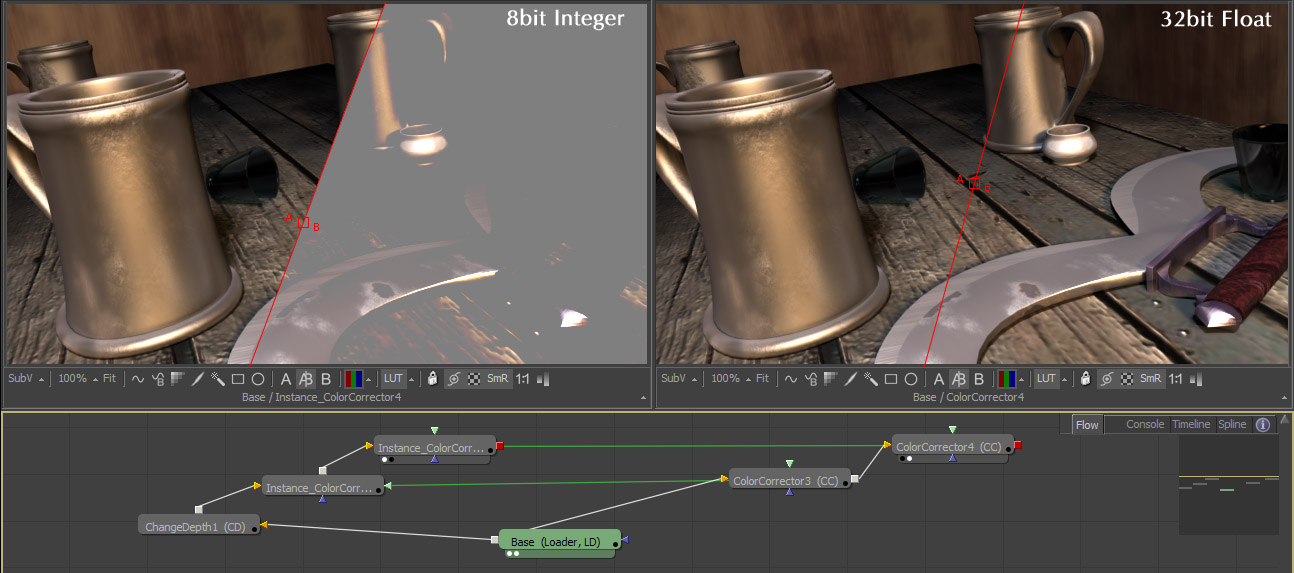
Both images here are having their colors compressed and then re-expanded by an identical, Instanced pair of Brightness tools in Fusion5. The panel on the left shows the result of the original image first being converted to an Integer, 8-bits per channel before being color-corrected - there are huge difference between the original and the affected. The panel on the right shows the same process applied to the image using full, 32-bit float color-space... its result is identical to the input.
The less time you spend in render, the faster your work will be complete.
New Hotness

All of the individual Buffers that LightWave uses to calculate its final render are available to both pixel and Image Filter Plug-Ins, so some clever programmers began coding tools that would sift through these Buffers and save-out each Buffer you chose, either as each Antialiasing pass (pixel Filter) is rendered, or after the whole image is rendered, and ready to be saved to disc, (Image Filter).
Some of these Buffer-Saving Filters worked better than others, but all of them let you "Break-Out" an Image into its various component parts, (Specularity, Reflections, Shading, etc.,) in one, render pass, and with a minimal amount of drudgery.
File Format
Not all high-bit-depth file formats are created equal. Some can't hold Alpha channels... some have slight "noise" through areas that should be a constant value... some are limited to 16-bits-per-channel, some are Integer, some are Floating Point, some can be either... and some allow for the saving of more than just the standard, Red, Green, Blue, Alpha channels within a single file.
Early on, I explored LightWave's Photoshop PSD Export filter. It comes with LightWave, gives you a wide range of Buffers and controls, embedding the channels all into one, easy to manage file, and gives you the ability to save 16-bits per channel images. The two caveats I found with this is that the files can get to be pretty sizable, and a lot of Photoshop's tools were disabled when you worked with a high-bit-depth image. (You could still work in Cinepaint of Fusion with this kind of high-bit-depth image, but if you wanted to use GIMP or Photoshop to natively explore the 16-bit option for these files, your options were limited.)
I'd been following ILM's Open-Source, OpenEXR format for some time, (www.openexr.com/). It's a format that supports up to 32-bit, floating point images, with additional channel buffers, and modern, lossless compression technologies. It's solid-color areas are clean and continuous, and with its RLE, ZIP, ZIPS, and PIZ supported lossless compression algorithms, the files are small and easily portable. After exploring it in the later days of production on Kaze, Ghost Warrior, it became my file-format of choice.
Pieces
This summer, Kelly "Kat" Myers, the VFX Consultant on Battlestar Galactica introduced me to an EXR saver plug-in he was testing for the show. And while I don't want to sound like an "infomercial," I really like the way exrTrader worked into both Galactica's pipeline and my own, solving a lot of outstanding problems other solutions still haven't addressed.
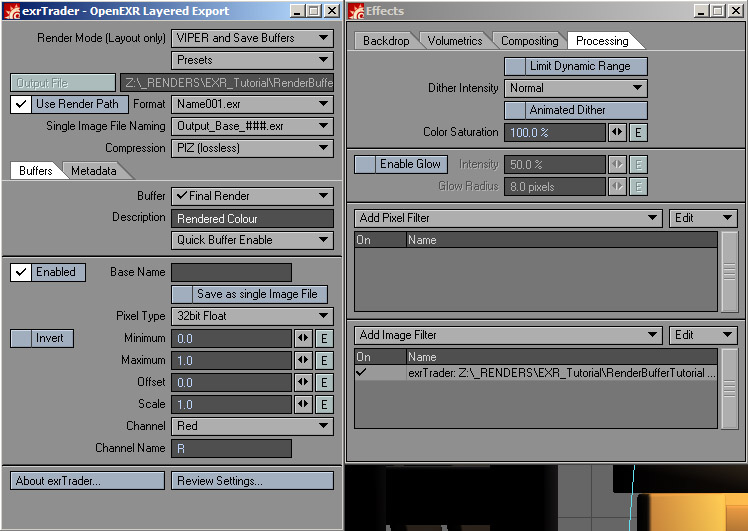
ExrTrader solves the problem I've had for years when working with Buffer-Savers, in that it polls LW to see where you have your Save RGB Output Path set, and writes its image there, without needing to be told in its Image Filter interface. (There were a couple times on Kaze where I forgot to change an older Buffer Saver Plug-in's output directory and ended-up overwriting perfectly good renders.) ExrTrader integrates a "Dummy" Image saver into your Render Globals > Output > Save RGB > Type options so that LightWave and network rendering apps know where to expect the .exr files it saves, but LW doesn't actually need to write an image file with its standard, non-Layered image savers.
EXR Trader
The Layering ability of exrTrader lets you choose to include in your rendered image, if you wish, additional buffers for: Raw Color, Reflection Color, Diffuse Color, Specular Color, "Special" Buffers, Luminosity, Diffuse, Specularity, Reflectivity, Transparency, Shading, Shadow, Geometry, Depth, Diffuse Shading, Specular Shading and Motion Buffers. All this can be written into a single file, or be written into separate files in subdirectories it makes, drawn from the Base name you can modify for each Channel.
And something else I found very handy with exrTrader is its ability to save both network/global Presets and individual user presets. So, whenever I have to export Buffer-set "A" for my Radiosity or Translight pass, I just select it from the drop-down box, just as I do for Buffer-set "B" for key-light specific Shadow, Specular highlight and Diffuse information.
I'll be showing you some techniques on how to use some of these Buffers in the following article, but to get you started, here are examples of most of the buffers, what they do and how they can be used:
Buffers Supplied by LightWave"
Final Render (RGB)

This is the render you'd get directly out of LightWave. I often use this as the base, over which I lay channels I've post-effected.
Alpha (single channel)
This is your standard, "variable transparency," Alpha Channel - white is opaque, black is transparent. (Not shown since in the example images, the walls of the Tavern are opaque, so the entire image is A=100%.)
Raw Color (RGB)

This is the raw, base coloring of the rendered items, before any kind of shading is applied. (In this image, the tankards appear to have shading because I'm using a Gradient to darken them based on Camera-Incidence.) This is often used to bring-back details lost in dark shadows, or as a base, onto which (often) single-channel buffers are layered to completely control the way the components are brought together to yield a final image.
Reflection Color (RGB)

(This Buffer is usually pretty dark, so I've boosted its Gain with a Color Corrector in Fusion5 for this image.) Here you see the reflections, both Ray-Traced and Mapped. You can increase the intensity of reflections by Merging this over your Final Render using (most often) a Screen or Color Dodge setting. You can decrease the intensity of reflections by Merging this over your Final Render using the Difference setting.
Diffuse Color (RGB)
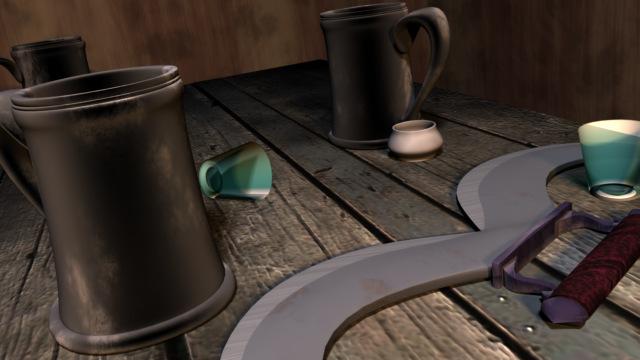
This buffer contains the Diffuse RGB shading information. This is often used as a replacement base, onto which other buffers are layered to give more control to the way the image components are brought together to yield the final image.
Specular Color (RGB)
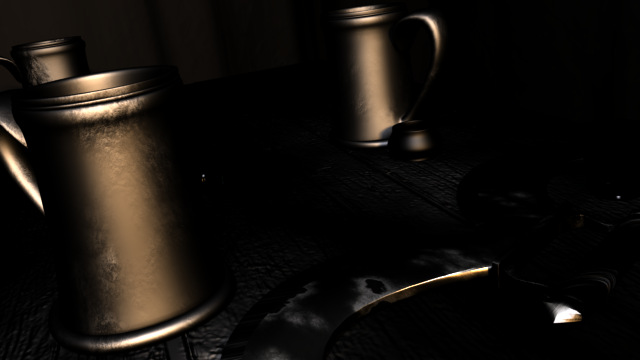
This is the RGB shading information for Specular "highlights." I most often use this to create Specular "Blooms" and "Stars" to simulate camera filters.
Special (single channel)

This buffer takes its values from LightWave's "Special Buffers" settings (Found under: Surface Editor > Advanced > Special Buffers). I use this to isolate specific areas I may need to work with individually later, such as shadow-catching planes, or surfaces that may suffer from pixel-crawl that might need temporal blurring or other tweaks. (Here, you see it applied to the wood textures of the Walls and Table... textures that I found have a tendency to "buzz/crawl" in certain kinds of camera-moves.)
Luminosity (single channel)
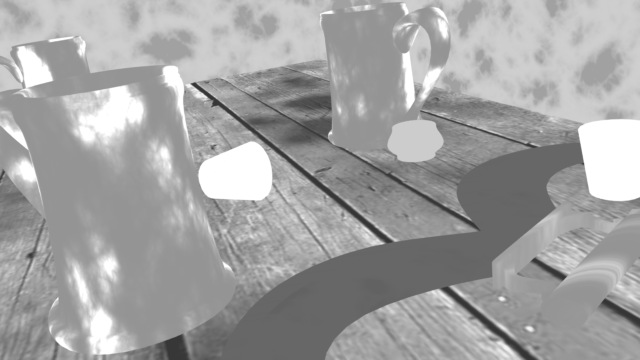
This channel shows how much Luminosity a rendered surface has, taking into account textures, shaders and whatnot. Things with a Luminosity setting of 0 are black, those that are 100% Luminous are white. This is helpful when you've got things like glowing buttons, signs, weapons or the like to isolate them from the rest of the scene to boost/reduce brightness, or add glows just to those items.
Diffuse (single channel)
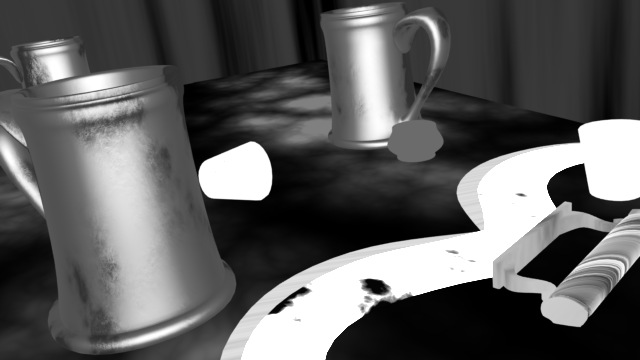
This channel is a record of the Diffuse amount resulting on rendered surfaces, taking into account textures, shaders and the like.
Specularity (single channel)
This channel shows how Specular a rendered surface is black for 0% Specularity, white for 100%.
Reflectivity (Single Channel)This channel shows how Reflective a rendered surface is black for 0% Reflective, white for 100%.
Transparency (single channel)
This channel shows how Transparent a rendered surface is black for 0% Transparent, white for 100%.
Shading (single channel)
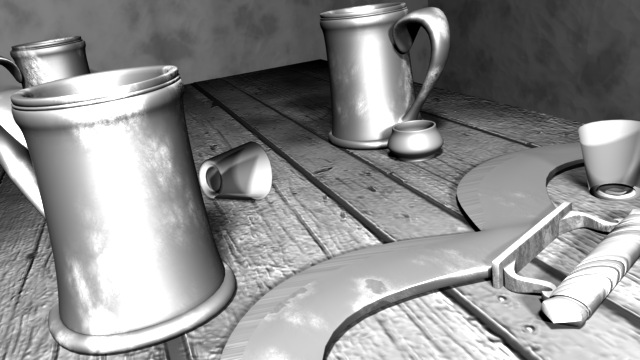
This channel shows the result of the Diffuse and Specular channels, without color information.
Shadow (single channel)
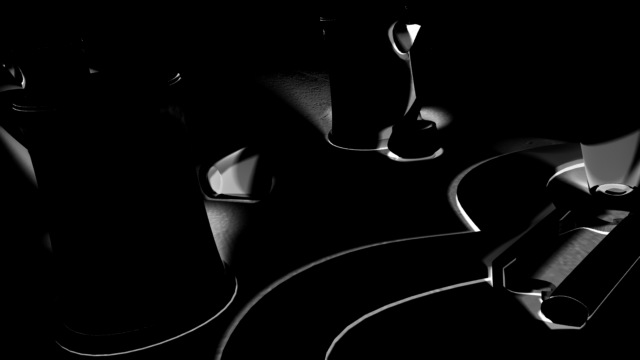
This is a helpful channel that shows the intensity of cast Shadows on surfaces. Black means there are no shadows cast upon that surface, white means that the density of that shadow is 100%.
Geometry (single channel)
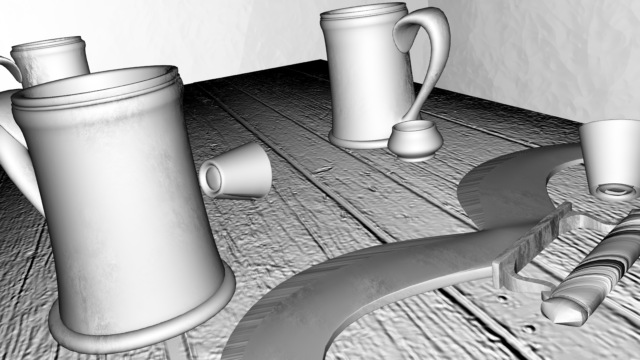
This channel shows you mesh and bump information With Respect To the camera. pixels that are turned directly toward the camera are white, while those perpendicular to the camera are black.
Depth ("Z-Buffer," single channel)
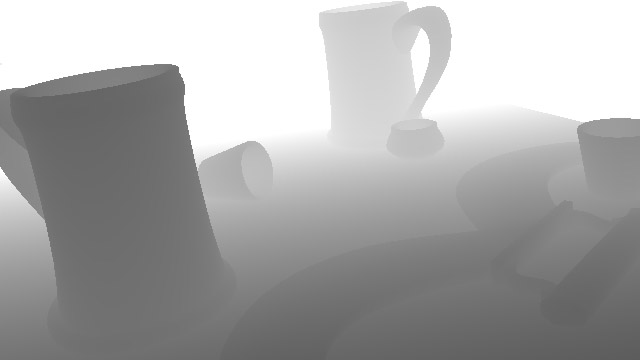
Depth is a helpful channel that shades pixels WRT their distance from the camera. In LightWave's renderer, pixels furthest from the Camera are white, and those closest to the camera are black. Using a Depth-Buffer (correctly,) you can instantly boost the production-value of your scene by using it as a mask to composite a de-saturated version of your image over the original to suggest atmospheric perspective, or re-light it by adding "Depth-Fog" set to black to darken items farther from the camera, or use it to composite complex, rendered elements into rendered backgrounds without the need of an Alpha channel! (We'll explore some of the uses of Depth Buffers in the next article.)
NOTE:
Most applications treat Z/Depth Buffers inversely to how LW does, where black is assigned to representing the farthest distances away from the camera and white, the closest. If your compositing package expects Depth information in this manner, (like eyeon's Digital Fusion,) you'll need to Invert LightWave's Z-Buffer. Tools like exrTrader have a handy "Invert" check-box for their channels.
DiffShade (single channel)
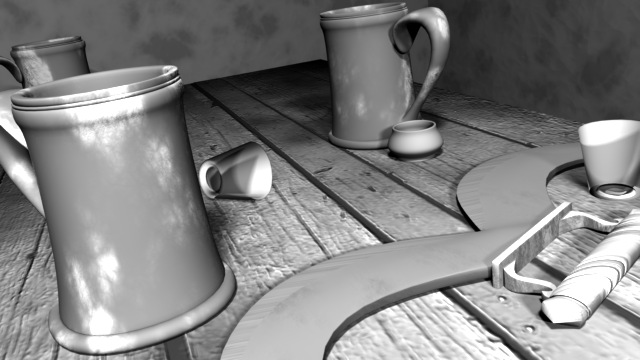
This channel is a grayscale image that shows the results of the Diffuse lighting and shadows on your objects.
SpecShade (single channel)
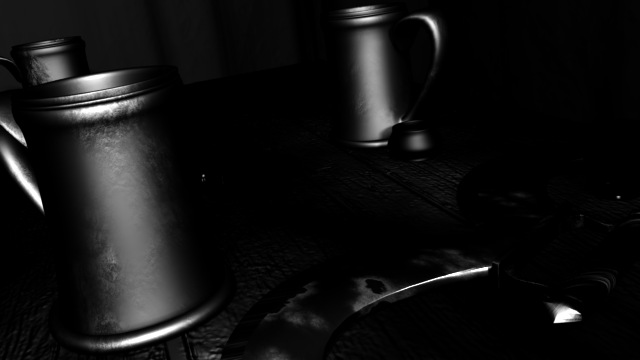
And this channel is a grayscale result of the Specular "hits" the scene's Lights create upon your surfaces. I sometimes use this instead of the Specular Color buffer when creating "blooms" glinting off bright metal.
Motion (single channel)
Motion is used by some specialized tools that can create pretty convincing motion-blur, in real-time, in your compositing application. (The ones I've worked with are still in Beta, so I can't make suggestions for which I'd recommend... yet. :)
Using the Buffers for Compositing
Recap
In the previous section, we traced the movement away from trying to perfect renders "In Camera" within the 3D package itself, and toward working with the rendered information as a base, in real-time, in a compositing package. We took a look at some of the Render Buffers that LightWave works with to create its final rendered image that we also have access to with a good Buffer Saver plug-in.
In this article, I'll be going through some practical applications of working with just a few of the Render Buffers. To cover as much ground as possible, I will be leaving it up to you to flesh-out your knowledge if I talk about a tool you don't yet know.
Toolset
The two commercial tools I'll be using in this article are:
- exrTrader, is what I'll be using for saving the LW buffers I'll be using into a single, layered, 32bit Floating-Point, openEXR file.
- Fusion5 (from eyeon software, eyeonline.com ), is what I'll be using as the compositing package to manipulate the Render Buffers into something greater than the sum of their parts.
If you use other packages, just look around to see where your controls that enable the same things I'll be doing are kept. The engines that drive 3D and compositing are generally the same, the interfaces require them to be driven in different ways, with elegance or exertion.
Saving Buffers
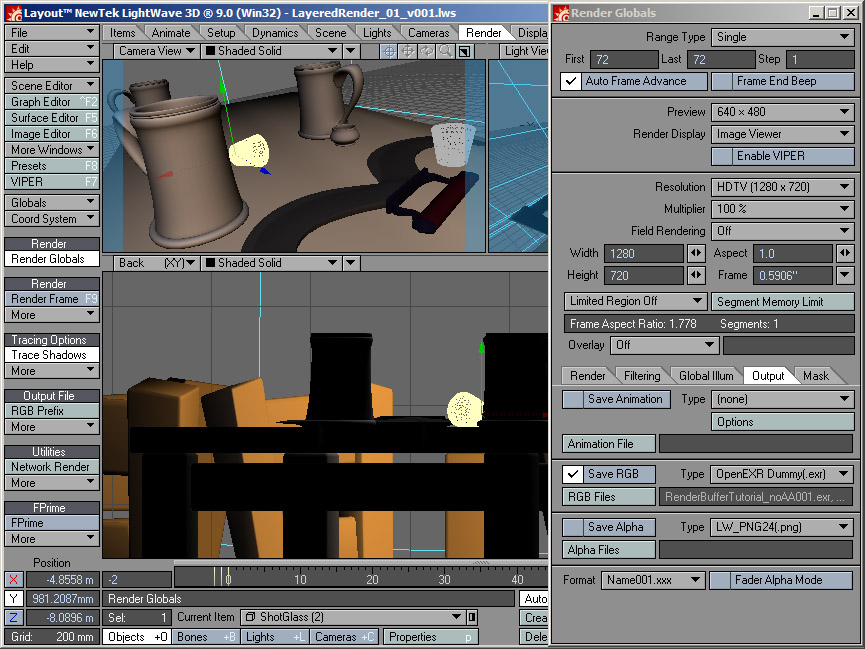
Once I have my scene ready to render, I point the Output of LightWave's files to the location and name I'd like for my rendered files. For the type of file to be rendered, with extTrader installed, I choose "OpenEXR Dummy(.exr)". This stores my output path and filename prefix for the other parts of exrTrader to access, but doesn't actually write a file, (though I could choose to save something small, like .JPG, so I could flip through the rendered files with a simple image-viewer like xnView or ACDSee).
Preparing the Depth Pass
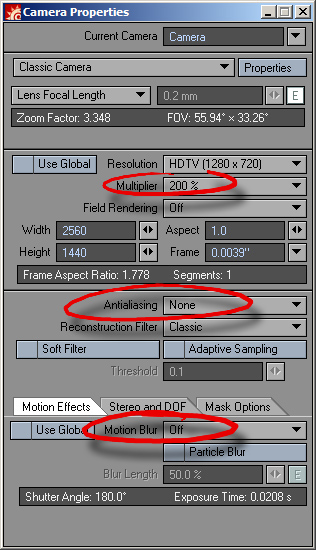
Next, since I'm planning on using Depth ("Deep PIXEl") effects on this image, I set my render resolution to twice that of my target resolution, (HD720p, in this case,) with neither Antialiasing, nor Motion Blur.
NOTE:
In order for Depth-based ("Z-Buffer"/"Deep PIXEl") effects to work properly, you've got to work in one of two ways. If your image (and Z-Buffer) is Antialiased, you've got to also work with Z-Coverage and Background buffers, (Z-Coverage is somewhat like a Depth-Based Alpha channel, telling the compositing package how much color of background Items can be seen through each PIXEl, and what color that is that PIXEl).
Since LightWave doesn't yet give access to Z-Coverage/Background buffers, (though NewTek is aware of the need and are working on enabling this,) when planning to work with Depth-Based effects, you've got to render without Antialiasing. What?!? Yep, you render without Antialiasing, but you render at twice your target resolution, (400%, if you've got a lot of fine details that could "buzz/crawl"in an animation,) work your Depth-Based effects on these non-Antialiased images, then get your Antialiasing by scaling them down to your target size. (It's a kid of "oversampling." Clunky, but it works!)
Using exrTrader

Then, under the Image Processing Tab, I add the exrTrader Image Filter that will save whatever Buffers we choose. By default, it's set to Use Render Path, which will automatically save the EXR files With Respect To our "standard" Save RGB settings we set in the first step! You also see that I've chosen the "PIZ," lossless form of compression, and Enabled only the Render Buffers I think I may need for this render.
Save and let LightWave render and save our frame as normal.

