
In Digital Fusion, I've dragged the rendered image into a new composition, created a copy of the Loader node, and on the copy's Format tab, set the Red, Green and Blue channels to be gotten from the Reflection (Refl.*) channels, which exrTrader Layered into the image file. (The "Final Render" is on the left, the Reflection Buffer is on the right.)
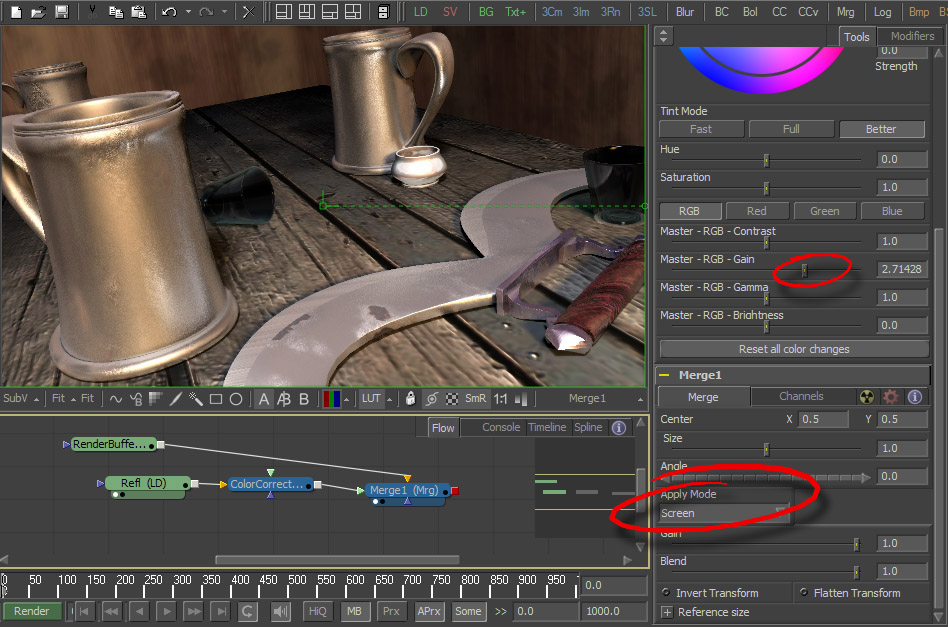
I want to bump-up the intensity of the reflections in my image, so I increase the Gain on the Reflection channels with a Color Corrector node, and then Merge it over my original, Rendered Image using the Screen mode. (I find that Screen, Lighten or Color Dodge will usually give me the effect I'm looking for - they each give me slightly different "flavors" of increasing the light areas of an image with the light areas of another.)
Massaging the Depth Pass
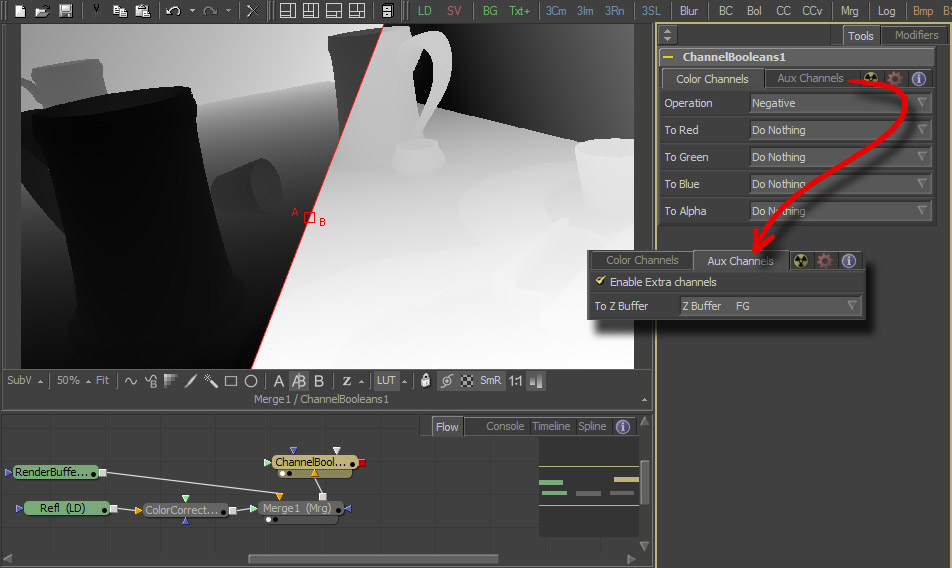
Next, because I didn't tell exrTrader to invert LightWave's Depth (Z-Buffer) Channel, I need to bring in a Channel Boolean node, telling it to "Do Nothing" to all Channels except the Z Buffer, and to it, mathematically invert it. (You see on the left, the original Z-Buffer as it comes out of LightWave, and on the right, you see it as Fusion needs to see it, with the PIXEls farther away from the camera being darker than those closer to it.)
Depth Based Compositing
Now, we can darken the Background based on the distance each PIXEl is from the camera by adding-in a Fog node. Fusion easily lets us "eyedrop" both the Near and Far Planes in our image window, assigning the level of effect each PIXEl's Z-Buffer value will allow for the addition of the Fog Color. We then set the Color and Opacity of our "Fog," and how smooth the transition will be from "Fogged" to "non-Fogged," with the Z Scale slider. (It now looks like we spent a lot of time "noodling" our lights to get this kind of fall-off in our scene, preserving the delicate rim/kick lighting we've got on the props!)
Depth Blur
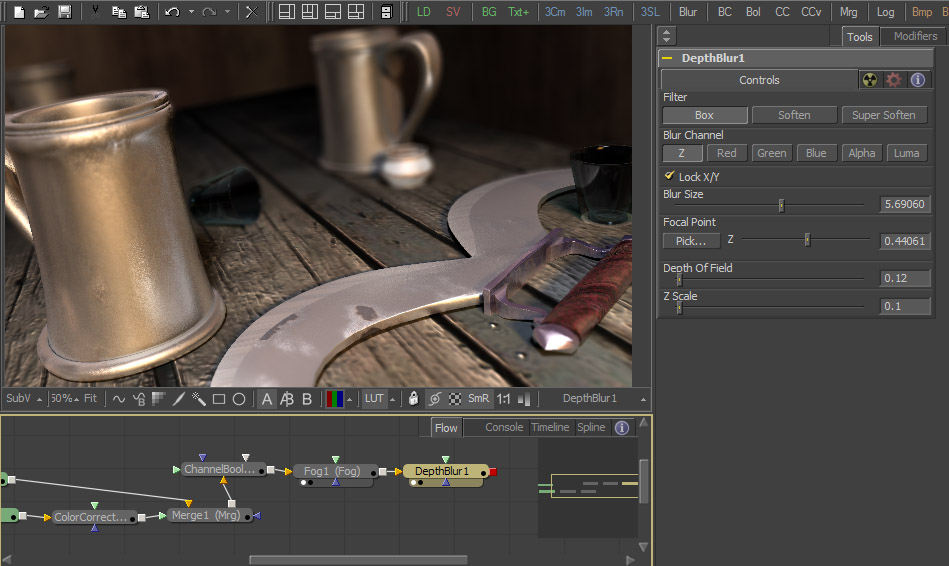
Next, we add in a Depth Blur node, where we can "eyedrop" a focal-point in the image window, adjust the Blur Size, and then massage the softness of the transition between in and out of focus areas with the Depth Of Field and Z Scale sliders. And we get something in moments, that looks like we spent hours calculating with LightWave's "physically correct" DOF settings.

Now that we are done with our Depth-based tools, we can Scale it down to its target resolution to get our Antialiasing. Here you see I've chosen B-Spline, out of the many options Fusion gives us for reducing and enlarging. I'm using "B-Spline," stylistically because of the softening effect it also has when affecting an image. (Whereas if I'd wanted to preserve the sharpness of the render, I'd have chosen, Sinc, Catmull-Rom or Lanczos.) I've also copied-and-pasted an Instance of this Scale tool because I'm going to next be working with the Spec channel which in this image doesn't need to worry about Depth-based issues, and attached right at the head of the flow, will keep the subsequent tools quicker by working with smaller amounts of data. (Pasting an Instance means that whatever is done to one, will be done to the other... so it's a quick way of getting the exact same settings between tools.)
Highlights and Glow
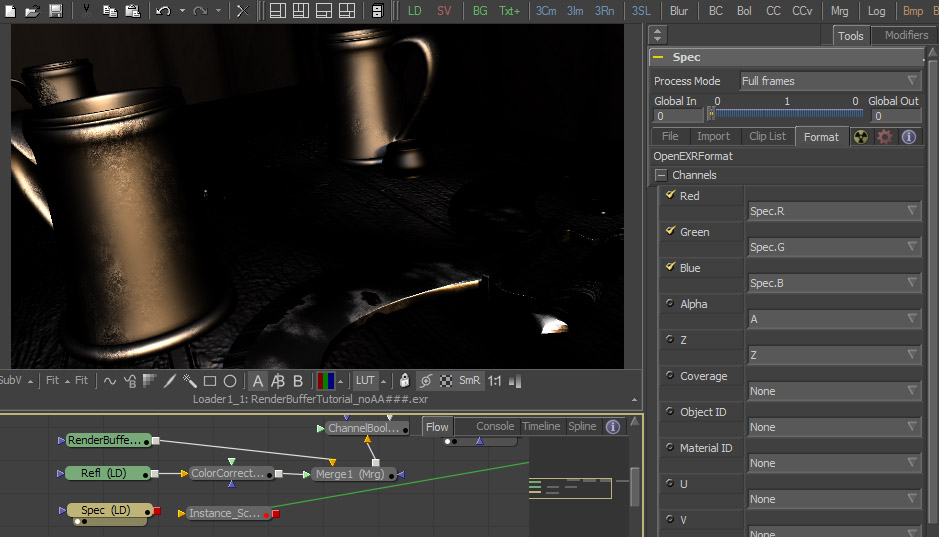
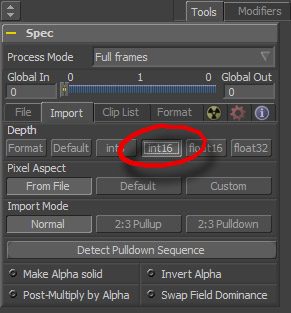
Now, I've copied-and-pasted the original Loader again, (renaming it "Spec",) setting its Color Channels to be the Spec, R/G/B channels saved by exrTrader. (I've deactivated Alpha, Z, and all the others since I won't be needing them to do what I'll be doing with this part of the flow.)
NOTE:
I've also gone into the "Spec" Loader's, Import tab, and setting the Depth to: int16, since I find the Highlight tool we'll be adding gives me more controllable results in compositing over other images when its source image is Integer-based.
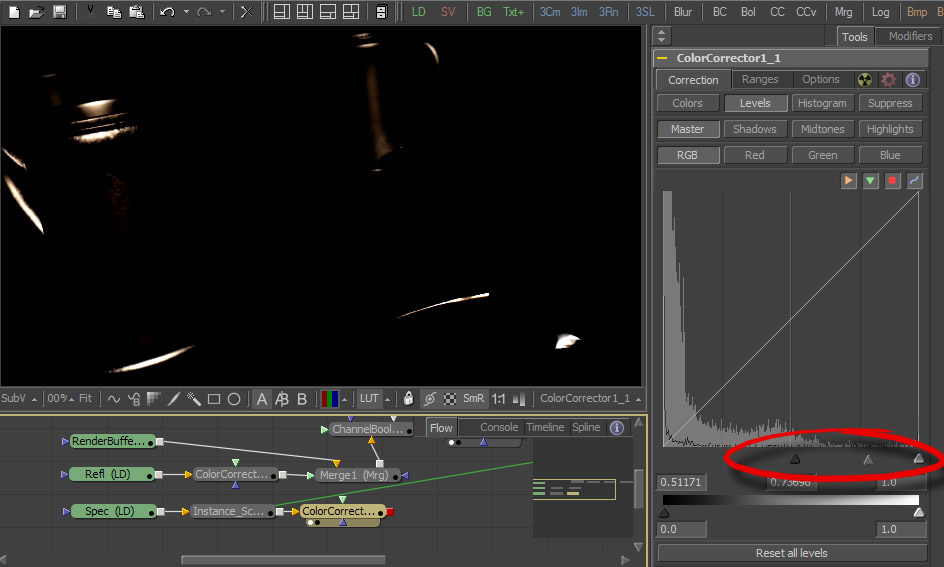
Hooking-up the "Spec" Loader to the Instanced Scale tool, I then bring-in a Color Corrector, adjusting the Master Levels to isolate the brightest Specular highlights.
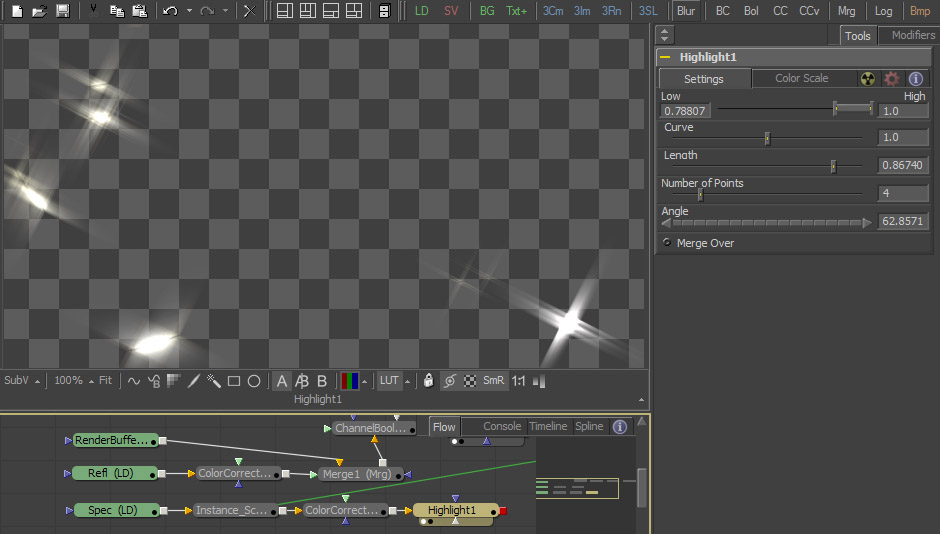
Next, I drag-in a Highlight tool, fussing with the settings until I get something that looks pretty, un-checking the "Merge Over" control so I get just the "stars," and not the "stars" already merged onto the source image.

...Because I'd like to soften (Blur) the stars, just a little, before applying them.

Next, I'm going to go back to the Spec Channel image, right as it comes out of the (Instanced) Scale tool, (before it goes into the Color Corrector which isolates the hottest Spec-hits,) and drag another branch of the Scale's output to feed a Glow tool to get a nice, "nylon-stocking-over-the-lens" feel to the Spec-hits.
I then Merge the "Star Filter" (Highlight) pass over the Glow's output using Overlay to get a nice, misty, dreamy element we'll be blending into our final image.

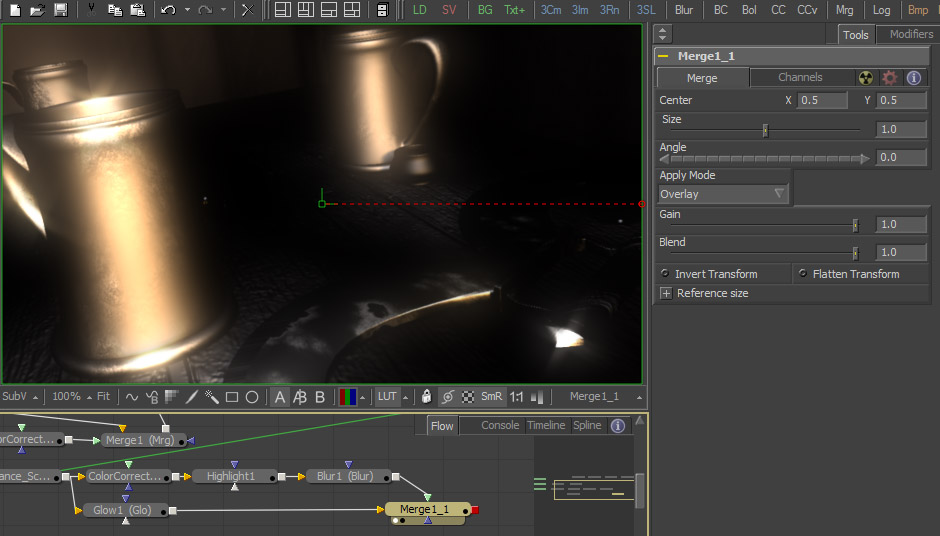
Finally, we Merge the Star and Glow Pass over the output from the first Branch using Lighten, to get something that looks pretty darn spiffy!
Summary
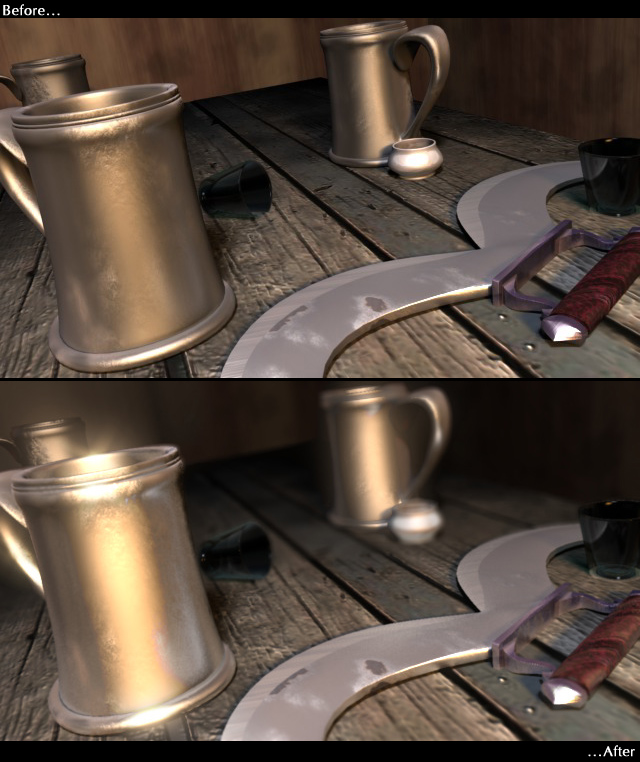
Pretty neat, that all the information to quickly go from the top image to the bottom image was "burried" within LightWave's Render Buffers!
What we did here, was using only four of the many Buffers LW gives us access to. And bear in mind, I'm no compositor, not really. These tools, in the hands of someone who's mind is truly excited by the ways these different puzzle-piece elements can be blended together to create the truly breathtaking, can work magic.If you're an independent filmmaker, like I am, and do and learn things because they have to be done, knowing about the power of Render Buffers, and how much time they can save, can allow you to do a lot more with the time you have for a production!
Keep exploring and finding out new ways to get your vision on screen, the way you see it in your head, quickly and with as much ease and enjoyment as you possibly can!
Good journeys!
Timothy
Timothy Albee is a Writer, Director, Animator, and author of several books on Animation, LightWave 3D and Filmmaking.
Many more tutorials and other fun thing by Timothy Albee can be found at:
LoupGuru.com
TA-Animation.com
KazeGhostWarrior.com